Module 4: Firebase Setup
Goals
To set up Firebase for use with our Angular app. This is a setup-only module with no conceptual explanations.
Create new Firebase Project
Disclaimer: Unless you use Firebase and Angular for a living, it’s unlikely that you will remember these exact setup steps - that’s fine - we don’t want you focusing on the 1-time setup, instead you should be focused on the other modules in this project, like how to actually use this after setup.
Visit the Firebase home page here.
In the top right corner, sign in to Google, and then “Go To Console”.
Create a new project.
Enter a name for your project, and then click “Create Project”.
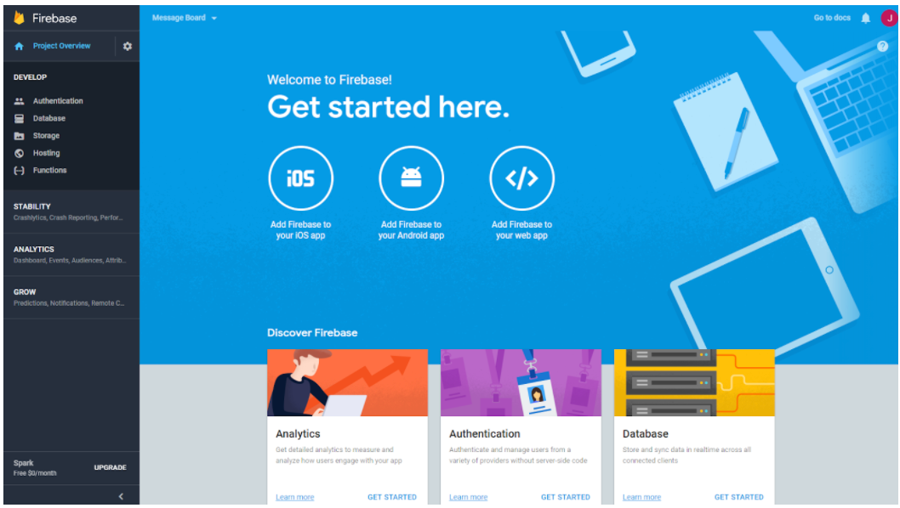
You will then be directed to a website looking something like:

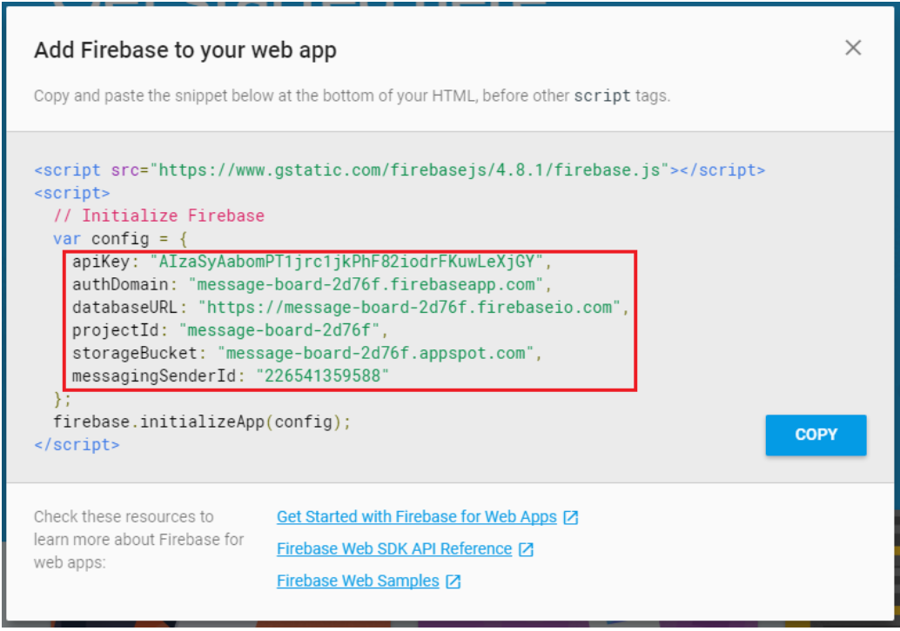
Click on the “Add Firebase to your web app” to display your project details.
You should see a modal with some information. Keep this page up we'll use this shortly
Configure Angular Project
We’ll need two packages - one for Firebase (“firebase”), and another to make Firebase and Angular play well together (“angularfire2”). run
npm install firebase@^4.13.1 angularfire2@5.0.0-rc.3 --saveWe have a few more packages we will need to make everything work together.
run
npm install webpack firebase-cli popper.js rxjs-compat --saveAgain, the Angular “boss” file will need to be aware of these Firebase packages. Open
app.module.tsand import these modules:import { AngularFireModule, FirebaseAppConfig } from 'angularfire2'; import { AngularFireDatabaseModule } from 'angularfire2/database'; import { AngularFireAuthModule } from 'angularfire2/auth'; import { AngularFirestoreModule } from 'angularfire2/firestore';We also have to include them in the “imports” section, so it should look like this:
And now you see the red underline beneath “firebaseConfig”, the same way we saw a red underline beneath “routes” earlier, before we created the “routes” variable. Time to do the same thing for “firebaseConfig”. Open the Firebase website and copy the configuration settings.

Create a new const called firebaseConfig in your
app.module.tsabove@NgModule, with the above data. It should look something like this. Note that the typescript linter may yell at you to use single quotes.
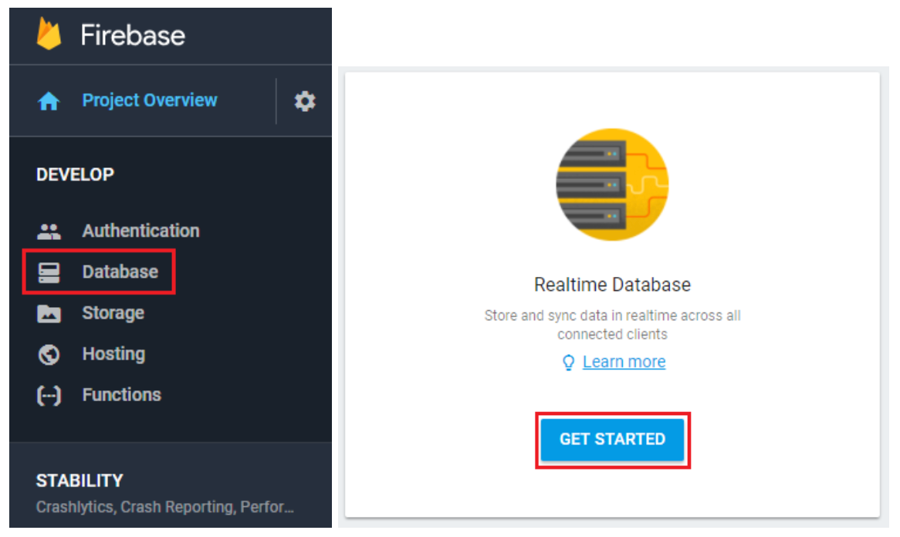
Return to the Firebase console and close the configuration popup. Select the “Database” tab on the left side of the screen, and then “Get Started” under the Realtime Database.

Select Start in Locked Mode.

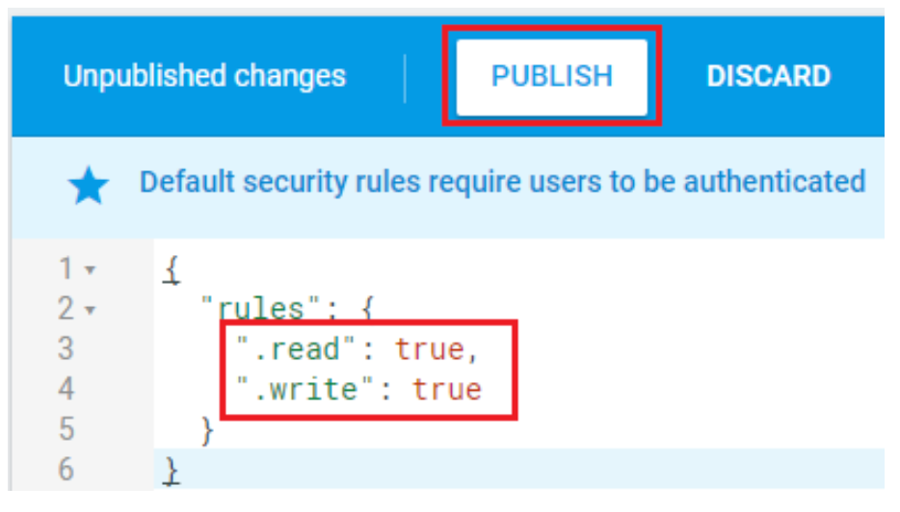
Switch to the “Rules” tab at the top

Adjust the “read” and “write” rules to always be true (everyone can read and write to our database). Make sure to “Publish” the changes. You will get a warning that “your security rules are defined as public, anyone can read or write to your database” - that’s fine for now.

Return to the "data" tab:

Return to your code, and run “ng serve” again. Open your website and check your console - you should have no errors.
Since we’re at the end of a module, let’s do a quick git commit!
Next, we'll learn about authentication.
Last updated